
The Contract Compliance Reporting page is a powerful reporting tool that allows users to create customised reports and gain comprehensive insights into their contracts.
This guide explains how to navigate the Contract Compliance page, modify the table view, and export tailored reports for effective contract management.
📌 Tips:
When to Use This Feature
✅ When monitoring contract compliance.
✅ When comparing contracts using document statuses.
✅ When creating customised reports for internal analysis or stakeholder collaboration.
✅ When exporting data for external reporting or audit purposes.
Step-by-Step Guide
Step 1: Open the Contract Compliance Page
Click on Contract Management in the left-hand menu.
Click on Contract Compliance.
📌 The default view will display a list of all contracts along with:
The linked Supplier
Who's Managing the Contract
Contract Notice Period dates
Contract End dates
Expired Documents
Unapproved Documents
Step 2: Filtering Contract Data
Use the filters at the top of the table to filter specific groups of suppliers.
Example: View only contracts with expired documents
Step 3: Customising the Table View
The Contract Compliance page allows users to modify the table based on specific reporting needs:
Using the Blue Category Buttons to Customise Columns
Click on the General Column Button to add/remove general supplier information:
Click on the Documents Column Button to insert document statuses:
View which suppliers have specific documents uploaded, approved, or expired.
Add multiple document types for a comprehensive compliance check.
Step 4: Viewing Document Data
Document Data
When a document type is added, it will also appear at the end of the table.

A tick mark next to a document type means:
The document is uploaded to the supplier profile.
The document is approved.
The document is valid (not expired).
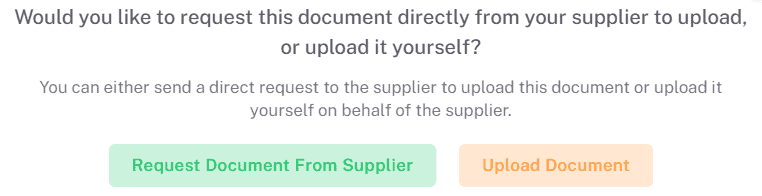
Expired documents are clearly labelled and can be renewed by being uploaded / requested again
Upload / Request directly from the supplier any missing documents
Documents already uploaded and Unapproved or Awaiting Supplier Upload are clearly flagged
Step 5: Exporting Customised Reports
Once the table is customised, click on the Export button to download the report.
Choose the format:
CSV – For spreadsheet analysis and bulk data processing.
Excel – For easier report formatting and sharing.
Key Considerations & Best Practices
✅ Use Filters for Focused Reports – Narrow down supplier data for specific compliance checks.
✅ Monitor Document Expiry – Check for expired supplier documents and follow up accordingly.
✅ Customize Reports for Stakeholders – Select relevant columns before exporting reports.
✅ Regularly Update Contract Records – Ensure the latest data is displayed for accurate reporting.
Additional Resources
📌 Related User Guides:
Adding & Requesting Contract Documents - How to upload and approve contract compliance documents
If you need further assistance, please contact your internal platform administrator for support. Otherwise please reach out to oboloo's support team. If you are unable to view the above area in the oboloo platform, please check your user permissions and access rights.