
Milestones are essential components of the Savings Management System, allowing users to track and manage savings over time.
By breaking down a savings project into smaller, structured sub-projects, milestones provide a more efficient way to monitor progress.
This guide covers:
How milestones work
How they are calculated
The differences between automated and custom milestone builders
How to edit milestones
How to mark milestones as complete
How Do Milestones Work?
Milestones sit under a parent savings record, allowing you to divide a savings project into smaller, manageable sub-projects. You can:
Create milestones when setting up the savings record
Add milestones later by navigating to the Milestones tab within the parent savings record
Why Use Milestones?
Organized Tracking – Consolidates multiple savings records under one parent project
Better Progress Monitoring – Allows users to track savings in phases rather than managing separate projects
Improved Reporting – Ensures all savings related to a single project are grouped for easier analysis
💡 Tip: If you’re tracking savings on a year-long contract, you can create:
12 milestones (one for each month)
4 milestones (one for each quarter if measured quarterly)
Realizing & Completing Savings
Until marked as complete, savings values remain in a projected state. Once completed, they are considered realized savings.
To realize savings, navigate to the Milestones tab within the Savings Project and mark a milestone as complete.
Creating Milestones
Automated Milestone Builder
The Automated Milestone Builder generates milestones automatically based on user inputs.
Required Inputs:
Savings Start Date – The start date for the first milestone
Frequency of Milestones – Options: Monthly, Quarterly, Bi-Annually, Annually
Number of Milestones – The total number of milestones to be generated
Total Baseline Spend – The total budget for the project
Projected Cost Reduction (Across All Milestones) – Expected reduction in costs over the project duration
Projected Cost Avoidance (Across All Milestones) – Anticipated cost avoidance over the project duration
📌 How It Works:
The system automatically distributes the baseline spend and projected savings evenly across each milestone.
Milestones are assigned start and end dates based on the selected frequency.
Custom Milestone Builder
The Custom Milestone Builder provides manual control over each milestone.
Steps to Create Custom Milestones:
Specify the Number of Milestones – Define how many milestones are required.
Enter Details Manually – Provide information for each milestone, including:
Start and End Dates
Baseline Spend
Projected Cost Reduction
Cost Avoidance
Editing Milestones
Milestones can be edited to adjust their details as needed.
Steps to Edit a Milestone:
Navigate to the Milestones tab within the parent savings record
Locate the milestone to edit from the table
Click on the milestone to update:
Start/End Dates
Baseline Spend
Projected Cost Reduction
Cost Avoidance
Marking Milestones as Complete
To finalize a milestone and realize its savings, follow these steps:
Navigate to the Milestones Tab
Open the Savings Project and go to the Milestones section
Select the Milestone
Locate the milestone you want to complete
Click ‘Mark As Complete’
This will open a new confirmation popup
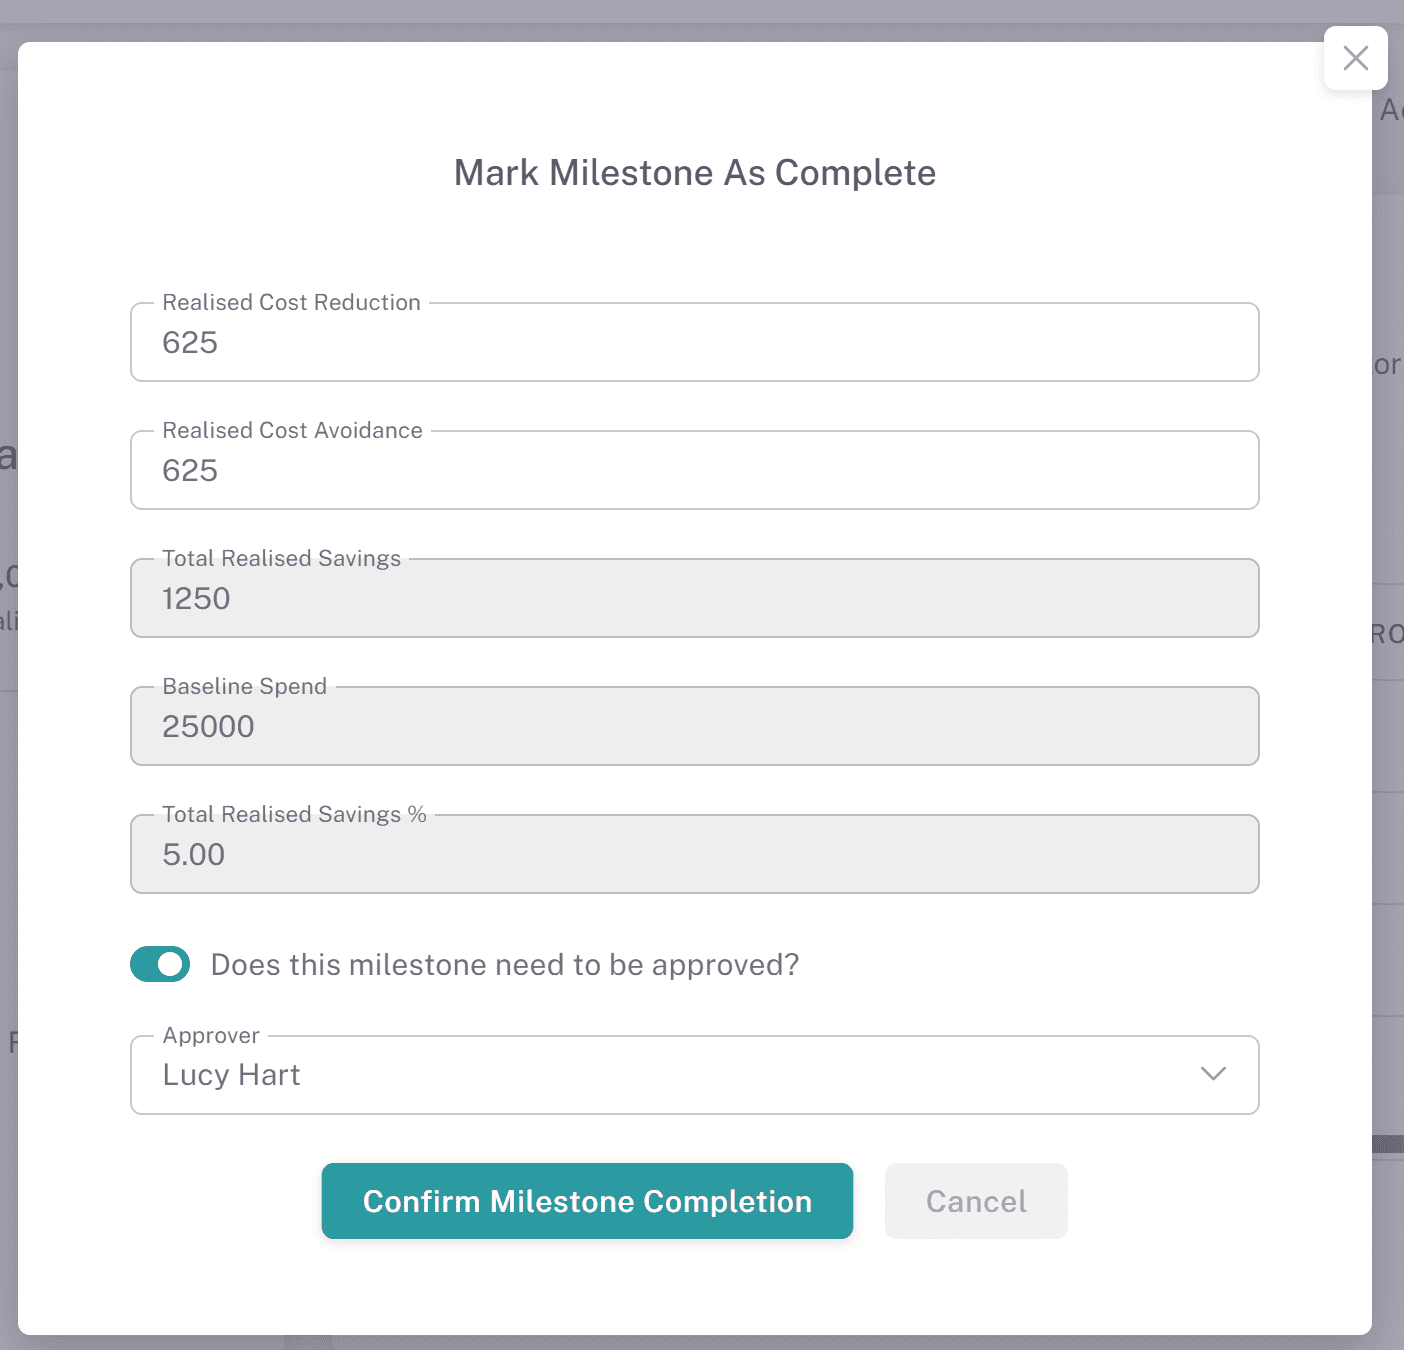
Amend Realized Savings (Optional)
If needed, adjust the realized savings amount
Confirm Completion
Click "Confirm Milestone Completion" to finalize
Milestone Approvals
Milestone approvals allow you to require approval when marking individual savings milestones as complete, ensuring savings are validated before being realised.
Where to Find This:
Navigate to Savings, open a savings record, and select the Milestones tab.Requiring Approval on a Milestone:
When marking a milestone as complete, you can choose to require approval.
Select Does this milestone need to be approved?
Choose an approver from the dropdown.
Confirm the milestone completion.
The milestone status will update to Pending Approval.
Approving or Rejecting a Milestone:
The selected approver will receive a notification.
Within the Milestones tab, the approver can use the Actions menu to review the milestone.
Selecting this option opens a confirmation modal where they can:
Approve Milestone
Reject Milestone
Approval Outcomes:
Approved:
Status changes to Completed
The milestone contributes to realised savings totals
Rejected:
A rejection reason is required
Status changes to Rejected
The milestone can be updated and submitted again for approval
Financial Impact:
Milestones with a status of Pending Approval or Rejected are not included in realised savings totals.
These remain within projected savings until approved.
Approval Tracking:
All approval decisions are recorded in the Approval Log, including whether the approval relates to a savings record or a milestone.
Milestone Table Information:
The Milestones table includes fields such as:
Approved By
Approved Date
These fields can be enabled using the Edit Columns option for additional visibility.
Why This Matters:
Requiring approval at milestone level provides greater control over savings validation, ensuring only verified savings are recognised and reported.
Milestone Analysis & Reporting
Once milestones are completed, visual analysis on dashboards is automatically updated.
📌 The system provides insights into the delta between:
Projected Savings
Pipeline Savings
Realized Savings
By effectively using milestones, organizations can track savings progress, improve financial planning, and maintain accurate savings records.