
If you are on a free forever plan, you can manage who within your organization has access to your oboloo account.
If you are on a paid Plus plan, access is managed differently via licenses. You can find out how to grant and revoke access on a Plus plan here.
When to Use This Feature
When activating an existing user on the oboloo platform.
When deactivating an existing user on the oboloo platform.
Step-by-Step Guide
Activating and deactivating a user on a free plan
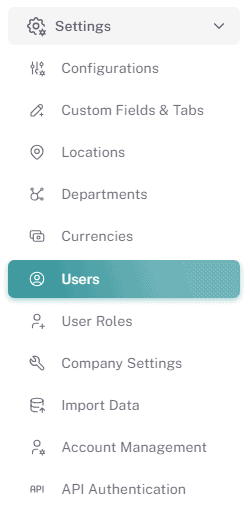
1. Navigate to Settings > Users
Access the Settings menu from the main navigation.
2. Select the User
Locate and select the user from the User Table that you would like to activate/deactivate. You can view their current activation status on this table under the 'Status' column.
3. Open the License & Plans Tab
In the user’s profile, go to the License & Plans tab.
4. Deactivate A User
Click the red Deactivate User button.
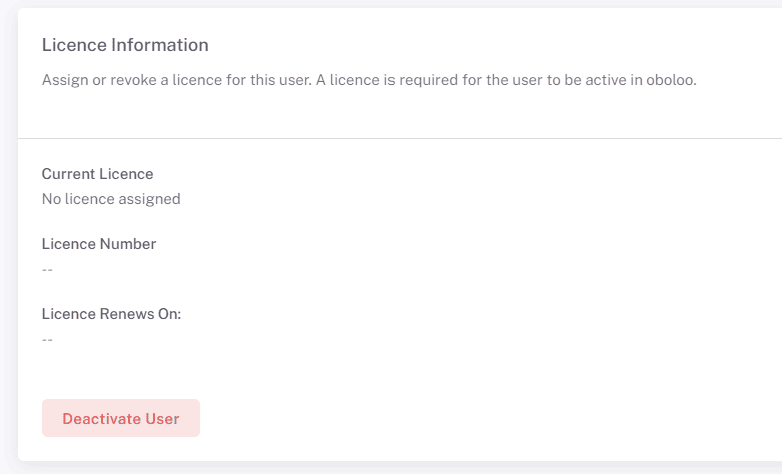
A notice will appear prompting confirmation.
Click the Confirm button to change the users status to Inactive.
The deactivated user will receive a 'Your oboloo licence has been revoked' email informing them that they can no longer access your organizations oboloo account.
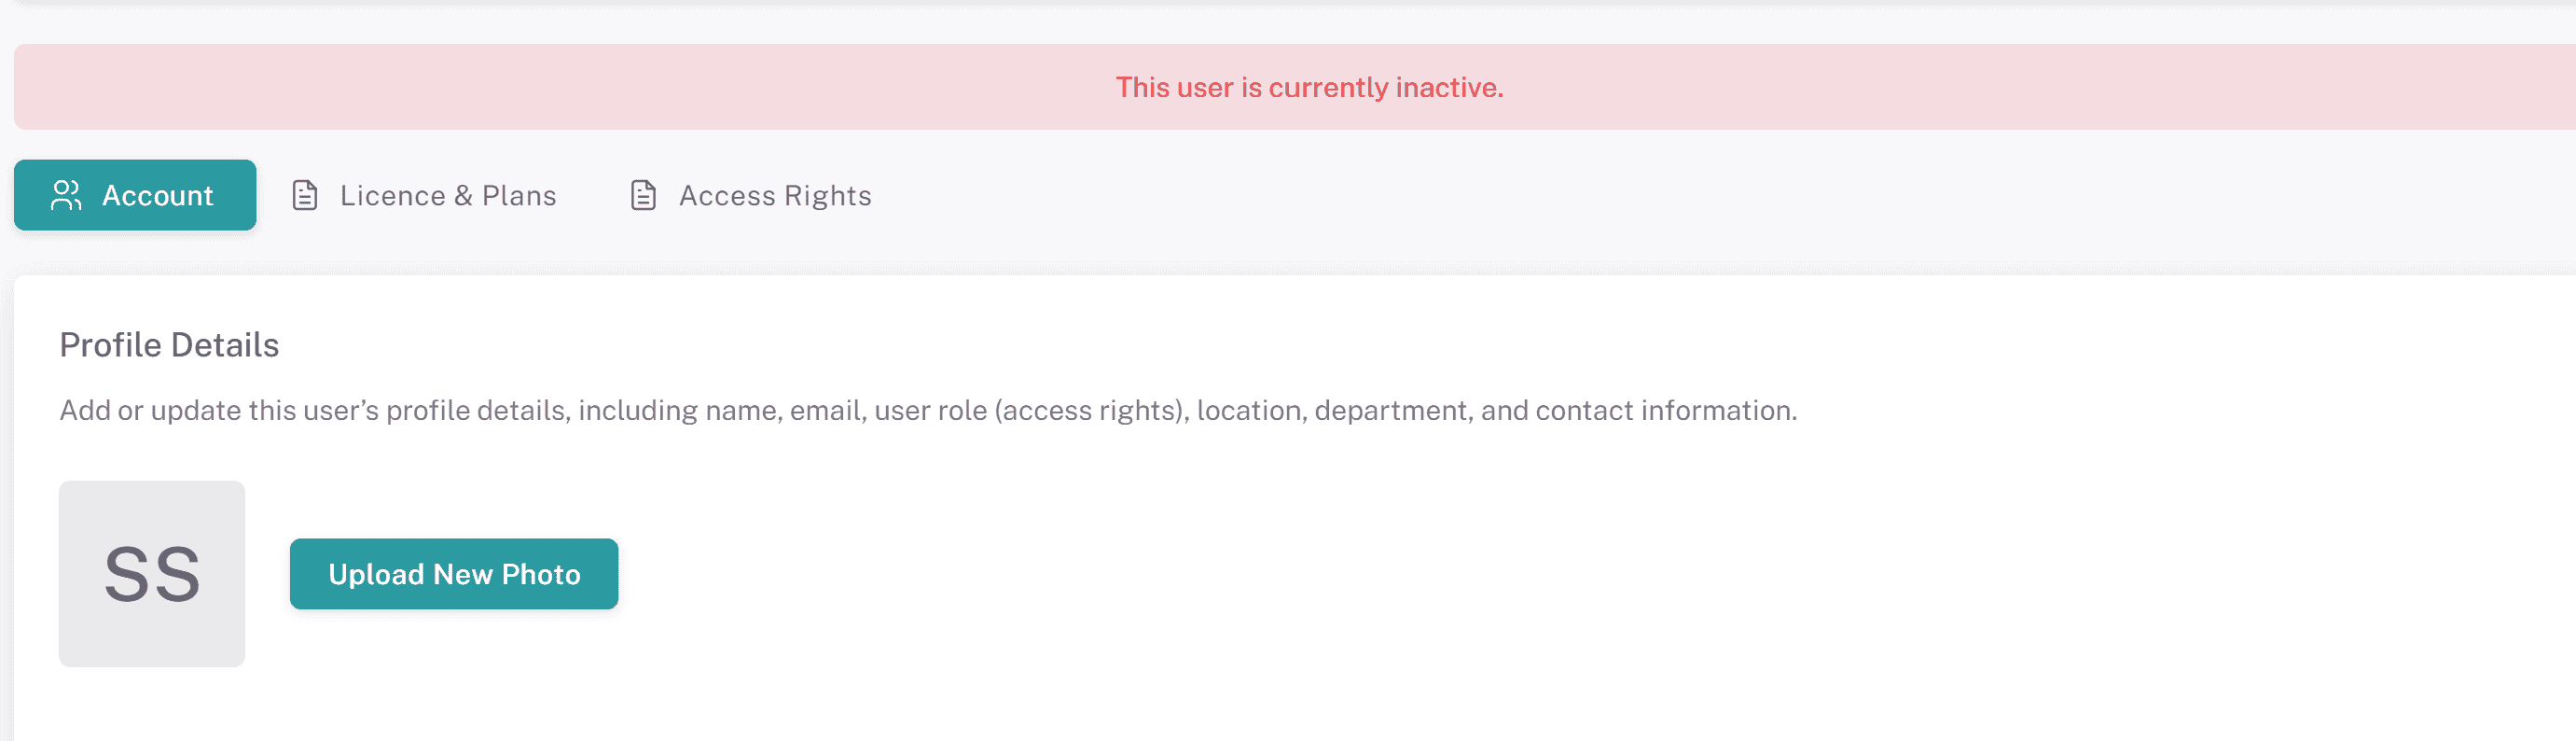
The users status in oboloo will change to 'Inactive' on the User table and a red banner will also display within their user profile settings on the platform to state that they are inactive.
5. Activate A User
Click the green Activate User button within the License & Plans tab

A notice will appear prompting confirmation.
Click the Confirm button to change the users status to Inactive.
The newly activated user will receive a 'Your organisation has assigned you an oboloo licence' email informing them that they can now access your organizations oboloo account.
The users status in oboloo will change to 'Active' on the User table and the user will now be able to log into the platform.
Key Considerations & Best Practices
✅ Ensure Proper Access Control – Only authorized personnel should be given access to your oboloo account.
✅ Monitor Available Licenses – Regularly check the activated users on your account.
✅ Revoke Access When Necessary – If a user no longer requires access, revoke their access.
✅ Verify Role Assignments – Assign appropriate roles to users after granting access to ensure they have the right level of access.
✅ Check Email Notifications – Users receive automated emails when access is granted or revokes. Ensure they are aware of any changes.
Additional Resources
📌 Related User Guides:
Adding A New User - How to Add new users
Managing User Roles & Permissions – How to assign and modify user roles.
Primary User - The user within an organization who is responsible for the account
If you need further assistance, please contact your internal platform administrator for support. Otherwise please reach out to oboloo's support team. If you are unable to view the above area in the oboloo platform, please check your user permissions and access rights.