
Creating a sourcing activity is a structured and customisable process that allows organisations to manage RFIs, RFPs, and RFQs efficiently.
The Sourcing Wizard guides users step-by-step to tailor sourcing activities based on supplier questionnaires, pricing requests, and supplier-specific information.
If you want guidance on a specific section of the sourcing activity creation process, refer to individual Sourcing User Guides available under the Sourcing section of the User Guides Home Page.
When to Use This Feature
When issuing RFIs, RFQs, or RFPs to suppliers.
When customising sourcing activities with pricing, questionnaires, and supporting documents.
When inviting suppliers to participate in a competitive sourcing event.
When ensuring transparency, efficiency, and structured supplier responses.
Step-by-Step Guide: Creating a Sourcing Activity
Step 1: Access the Sourcing Module
Click on Sourcing in the left-hand menu.
Click on eSourcing.
Click on Create Sourcing Activity to launch the Sourcing Wizard.
Step 2: Define the Structure of Your Sourcing Activity
Choose which sections to include in the sourcing activity. You can select any combination of the following:
Internal Sourcing Sections: Background information about the organisation or activity that suppliers need to know.
Supplier Sourcing Sections: Sections where suppliers provide detailed responses (e.g., project implementation plans, service level agreements).
Supplier Questionnaires: Structured questionnaires with weighted scoring to assess supplier responses.
Pricing Requests: Requests for product or service pricing, including unit prices, taxes, and shipping costs.
Click Next to proceed.
Step 3: Write the Sourcing Activity Summary
Provide a clear and concise title and description of the activity.
Specify the location and department related to the activity.
Click Next to continue.
Step 4: Set Opening and Closing Dates
Set the opening date and time – Suppliers will only be able to respond after this date.
Set the closing date and time – Suppliers must submit their responses before this deadline.
Click Next to move forward.
Step 5: Add Internal Information Sections
Select internal sections that suppliers will see. These provide background information about your organisation, submission instructions, or guidelines.
Click Add to Activity to confirm selections.
Click Next when all sections have been added.
Step 6: Add Supplier Information Sections
Select supplier-specific sections that require written responses.
Click Add to Activity to confirm.
Click Next when all supplier sections have been added.
Step 7: Add Questionnaires
Select questionnaires from the Sourcing Library.
Click Add to Activity to include them.
Click Next to continue.
New questionnaires can be created under the Supplier Questionnaires module.
Step 8: Add Pricing Requests
Add pricing line items for suppliers to submit quotes.
Product Name: Identify the requested product/service.
Product Code (optional): A unique identifier for tracking.
Unit of Measure: Specify how the product is measured (e.g., per unit, kg, litre).
Quantity: Specify the number of units required.
Click Add Another Product to add multiple pricing requests.
Click Next to proceed.
Step 9: Attach Supporting Documents
Upload any relevant specifications, drawings, or contract templates for suppliers to review.
Click Save to upload documents.
Click Next to continue.
Step 10: Select and Invite Suppliers
Choose suppliers from the Supplier Name dropdown.
Select supplier contacts to receive the invitation.
Click Add Another Supplier to invite multiple suppliers.
Click Next when all suppliers have been added.
Step 11: Preview the Sourcing Activity
Click View As Supplier to preview the activity from the supplier’s perspective.
Review the content to ensure all required details are included.
Step 12: Send the Sourcing Activity to Suppliers
Click Send to Suppliers to distribute the sourcing activity.
Confirm that you want to send the activity by checking the confirmation box.
Click Confirm and Send.
Step 13: Tracking Supplier Responses
Once sent, suppliers will receive an email invitation with their unique access code.
You can monitor responses on the eSourcing Home Page.
Notifications will be sent when a supplier submits their response.
Email Invite Status
The Email Invite Status feature provides visibility into whether supplier invitation emails have been successfully delivered, helping you quickly identify and resolve any delivery issues.
Where to Find This:
Navigate to a sourcing activity and locate the Invited Suppliers table. Click View/Edit on a supplier to open the Edit Supplier Contact modal.
Within this table, the Email Invite Status column appears directly after the Contact Name column.How It Works:
A column called Email Invite Status displays a status indicator for each supplier contact.
The status is shown as a coloured button:
Delivered (Green): The invitation email was successfully delivered.
Delivery Failed (Red): The invitation email failed to send or was rejected.
These buttons are display-only and cannot be clicked.
Why This Matters:
This feature improves transparency and reduces guesswork by clearly showing whether an invite email reached the supplier, allowing you to take action where needed and keep sourcing activities on track. If a supplier contact is showing as 'Delivery Failed', please check their email address and readd them to the sourcing activity.
Inviting Suppliers and Contacts After Publishing Your Sourcing Event
This feature allows you to add new suppliers or update supplier contacts after a sourcing activity has already been published, ensuring you can make changes without recreating the activity.
Where to Find This:
Navigate to Sourcing, open a sourcing activity, and remain on the first tab.
All actions are managed from the Invited Suppliers table.
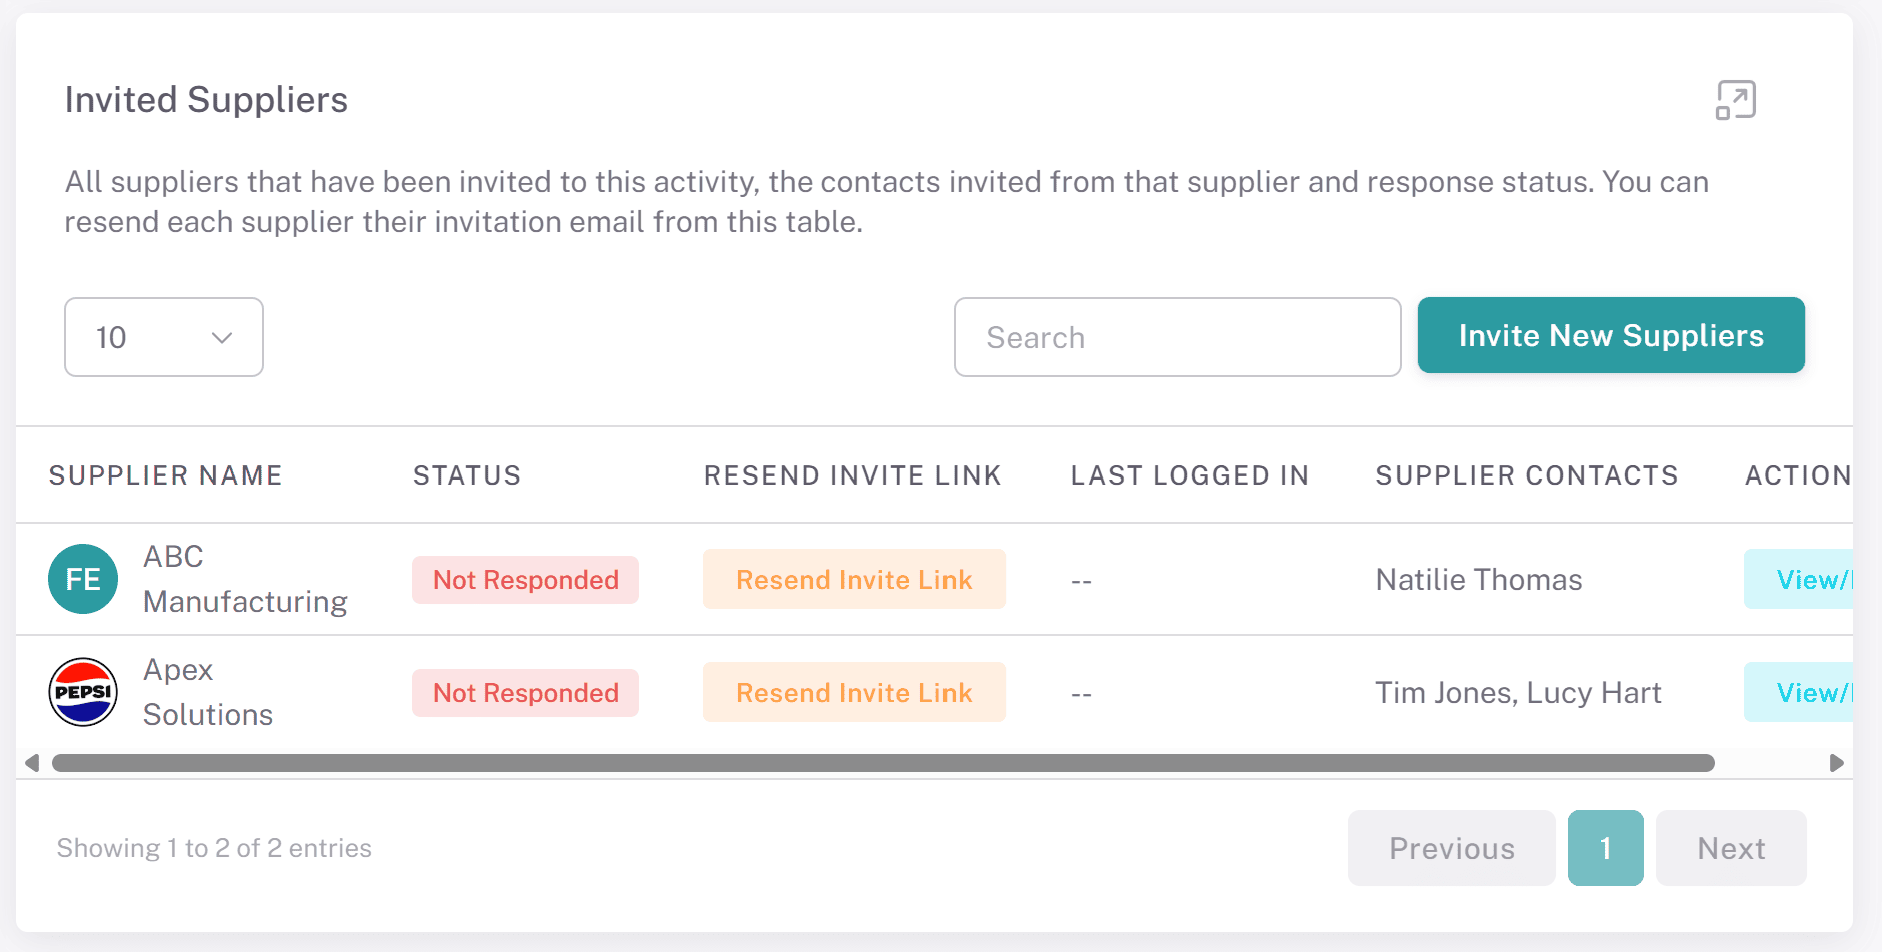
Inviting Additional Suppliers:
Click Invite New Suppliers above the Invited Suppliers table.
Select the suppliers and their contacts, then confirm.
Once added:
The suppliers appear in the Invited Suppliers table.
Selected contacts receive invitation emails.
Suppliers can access and respond to the sourcing activity as normal.
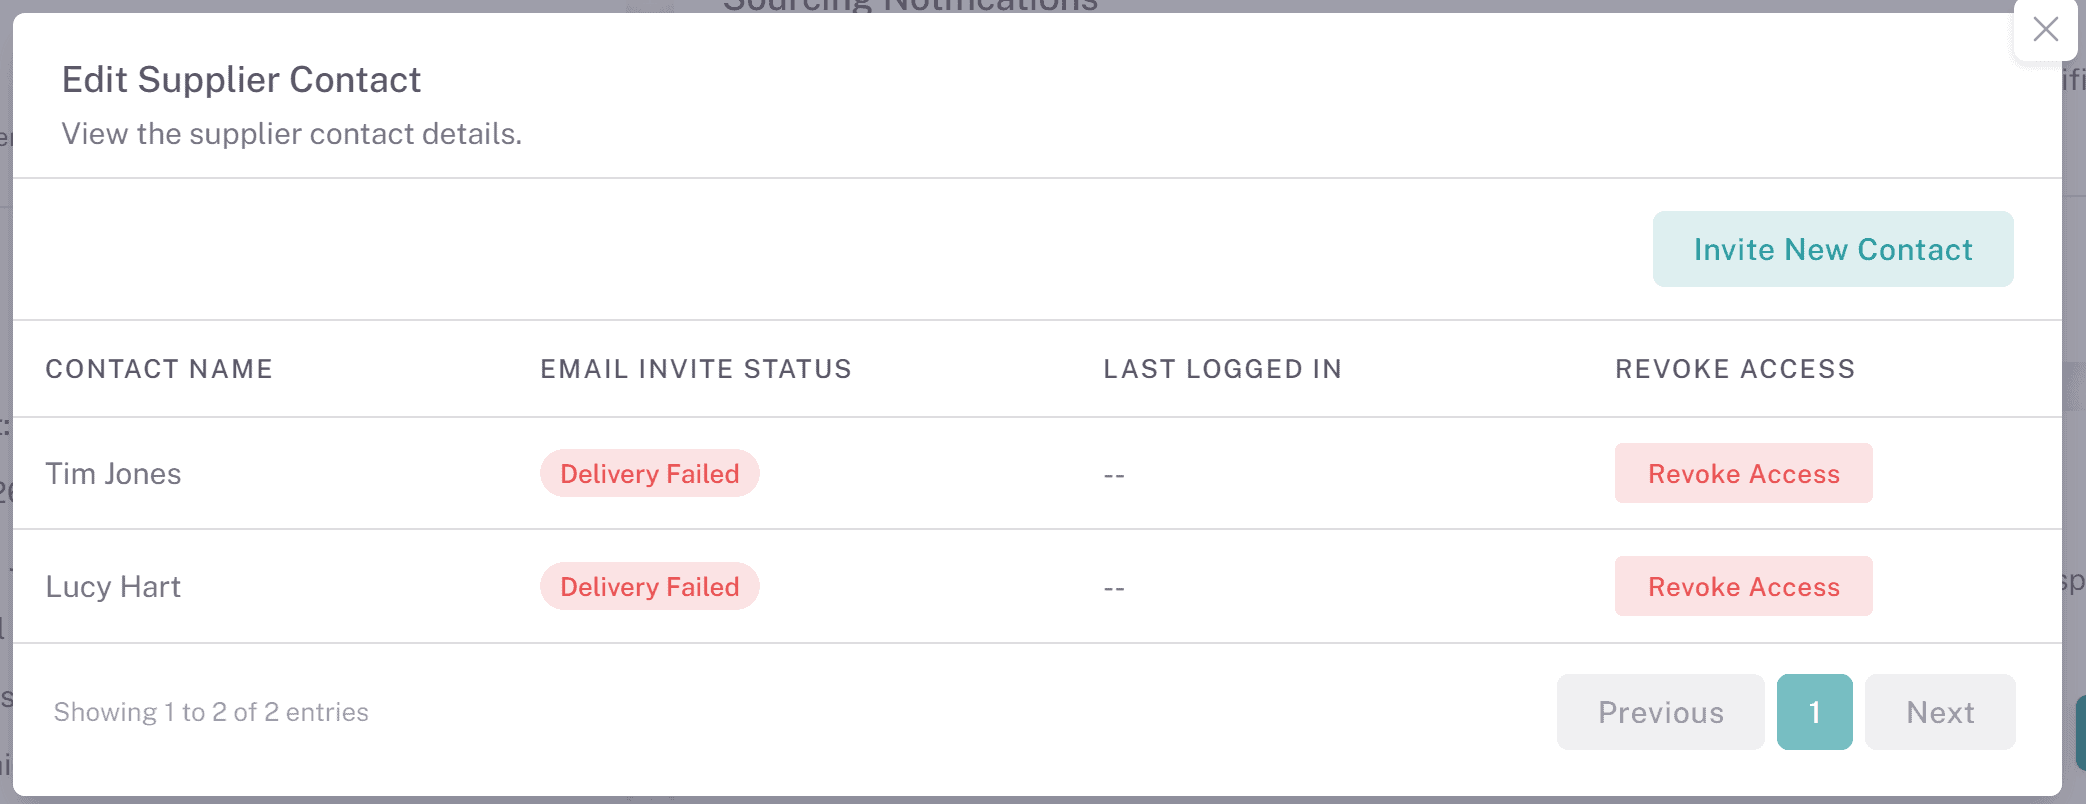
Managing Supplier Contacts:
In the Invited Suppliers table, click View/Edit within the Supplier Contacts column.
A modal will open displaying all invited contacts for that supplier.
The table includes:
Contact Name
Last Logged In (date/time of last access to the sourcing activity)
Revoke Access
Revoking Contact Access:
Click Revoke next to a contact to remove their access.
Confirm the action when prompted.
Once confirmed:
Access is removed immediately.
The contact is removed from the list.
The contact can be invited again later if required.
Important Restriction:
Each supplier must have at least one active contact.
If you attempt to revoke the last remaining contact, the system will prevent this action.
Inviting Additional Contacts:
Within the View/Edit modal, click Invite New Contact.
Select a contact and confirm.
The contact will:
Be added to the list immediately.
Receive an invitation email.
Why This Matters:
This functionality gives you full control over supplier participation, allowing you to correct mistakes, add missed suppliers, and manage access efficiently without disrupting your sourcing activity.
Key Considerations & Best Practices
✅ Customise Activities to Fit Your Needs – Select sections based on whether you are conducting an RFI, RFQ, or RFP.
✅ Use Weighted Questionnaires for Evaluation – Assign scores to supplier responses to compare proposals effectively.
✅ Invite Multiple Supplier Contacts – Allow suppliers to collaborate on a single submission for accuracy and efficiency.
✅ Ensure Pricing Requests Are Clear – Provide precise details on requested goods or services to avoid supplier confusion.
✅ Attach Supporting Documents – Suppliers should have all necessary information to submit accurate proposals.
✅ Preview Before Sending – Use View As Supplier to check the final setup from the supplier’s perspective.
✅ Monitor Responses in Real-Time – Track supplier activity and follow up on pending submissions before the deadline.
Additional Resources
📌 Related User Guides:
Supplier Sections – How to create supplier sections for sourcing events.
Supplier Questionnaires – How to create structured questionnaires in sourcing events.
If you need further assistance, please contact your internal platform administrator for support. Otherwise please reach out to oboloo's support team. If you are unable to view the above area in the oboloo platform, please check your user permissions and access rights.