
The primary supplier contact is the main point of contact for a supplier, and the contact oboloo uses when sending requests to that supplier.
Every supplier has one, and only one, primary contact. This works in the same way as the Primary User for your own organisation — a single named contact, clearly marked in the table, that the system knows to address.
Setting a primary contact means requests such as onboarding packages and compliance documentation requests are always sent to the right person, rather than needing to be selected manually each time.
When to Use This Feature
When you want to identify the main day-to-day contact for a supplier.
When a supplier has several contacts and you need to make clear who requests should go to.
When a supplier's main contact changes and their record needs updating.
When preparing supplier records so onboarding and compliance requests reach the correct person automatically.
Setting a Primary Contact
1. Creating or Editing a Supplier Contact
Open the supplier record and go to the Contacts tab.
Click to add a new contact, or open an existing contact to edit it.
Complete the contact details as normal.
Above the Save and Cancel buttons, tick Make this contact the primary supplier contact?
Click Save.

2. The First Contact Is Set Automatically
If you are creating the first contact for a supplier, that contact is automatically assigned as the primary contact. The tick box will appear already ticked and greyed out, because a supplier's only contact must be its primary contact.
The same applies when editing a supplier's only contact — the tick box stays ticked and cannot be cleared.
Identifying the Primary Contact
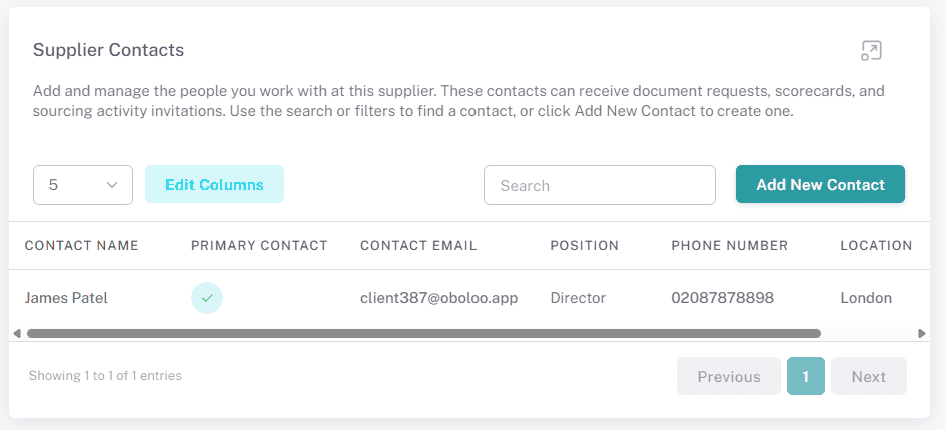
On the supplier contacts table, a green tick appears in the Primary Contact column against the primary contact. This column sits immediately after Contact Name and is shown by default.
The primary contact is also listed first in the supplier contacts table, so it is always visible at the top without scrolling or sorting.
Changing the Primary Contact
A supplier can only have one primary contact, so assigning a new one automatically removes the status from the existing contact.
Open the contact you want to make the primary contact.
Tick Make this contact the primary supplier contact?
A confirmation window appears titled Change this supplier's primary contact?, explaining that the current primary contact will be demoted.
Confirm the change to proceed, or close the window to leave the primary contact as it is.
Key Considerations & Best Practices
✅ Keep the primary contact current — If your main contact at a supplier changes role or leaves, update the primary contact promptly so requests continue to reach someone who can act on them.
✅ Choose someone who can respond — The primary contact receives document and compliance requests, so pick a contact who is able to provide them rather than a general or unmonitored address.
✅ Check the primary contact before sending requests — A quick look at the Primary Contact column confirms who a request will go to.
✅ Review after onboarding — The contact who handled onboarding is not always the right long-term day-to-day contact.
Additional Resources
📌 Related User Guides:
Adding A New Supplier – Creating a supplier record and its contacts.
Adding and Requesting Supplier Documents – Requesting documents from a supplier.
Supplier Onboarding Overview – Onboarding suppliers with document and scorecard requests.
Using the Supplier Compliance Report – Monitoring supplier compliance.
Understanding the Primary User – The equivalent role for your own organisation.
📌 Need Further Help?
If you need further assistance, please contact your internal platform administrator for support. Otherwise please reach out to oboloo's support team. If you are unable to view the above area in the oboloo platform, please check your user permissions and access rights.